Experienced do-it-yourselfers can install a shower tray themselves and thus save quite a bit of money. I explain how you can use step-by-step instructions to install the tub feet or a tub support yourself.
At a glance:
- The careful execution of the seal between the shower basin and the wall ensures that there is no water damage.
- A tub support is a styrofoam body on which the shower tray rests. It can be covered directly with tiles.
- Tub feet consist of a frame with adjustable feet and are covered with aerated concrete blocks.
- While the shower tray itself has a slope, the waste water pipe must be laid with a slope away from the siphon.
Installing the shower tray: options for installing the tray
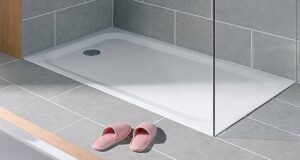
Shower tray on tub feet
A shower tray can never stand directly on the ground, but must always be elevated. This is due to the process, which applies about ten centimeters downwards. One option for assembly is therefore tub feet. It is a square frame with an adjustable foot in each corner and one in the middle. The shower tray rests on this frame and can be easily adjusted even on uneven ground. The cavity between the floor and the shower basin must then be filled, for example with aerated concrete blocks.
Shower tray in the tray support
An alternative to the tub feet is the tub support. A styrofoam body, which is tailored to the respective shower tub, is placed on the subsurface and the shower tub laid down. Additional feet are not necessary. In addition, no aerated concrete blocks are required, since the tiles are glued directly to the polystyrene body.
Floor-level shower
As a third variant, you can build a floor-level shower . It is characteristic that there is no step between the bathroom floor and the shower tray. This means that the shower is also suitable for people with restricted mobility or – as is common in modern bathrooms – as a walk-in shower without a shower cubicle. Splashes of water on the floor are pulled back into the wet area with the help of a squeegee. There are three options with this type of construction: either a super-flat shower base (with feet) is sunk so deep that the upper edge of the shower basin and the upper edge of the floor tiles form a line, or a tileable shower board with an integrated drain is used, or the screed is sloped into the shower area and a shower channel or drain installed.
Installing the shower tray: list of materials
- shower tray
- Liquid waterproofing with paint roller and sealing tape
- pencil
- level
- tub rim insulation set
- soundproof tape
- waste set
- HT tubes
- deep ground
- tile glue
- tiles
- silicone
For installation with bath feet:
- tub feet
- tub rim clamp support
- aerated concrete blocks
- saw
For mounting with tub support:
- notched spatula
- Construction foam/assembly foam
Installing the shower tray: step-by-step instructions with tub feet
Step 1: Prepare and seal the shower area
Before the actual assembly can start, you have to clean the work area. Dirt such as small stones on the subsurface or old tile adhesive will otherwise interfere with the sealing. Both the wall and the floor must be as smooth and dirt-free as possible. After cleaning, the shower area is sealed. The wall and floor are coated with a liquid sealant. This works best with a paint roller with a medium pile. Apply the seal in at least two layers up to the minimum thickness specified by the manufacturer. To ensure all areas receive at least two coats of paint, powdered paint is added to the caulk on the second round. There is special sealing tape for the corners, which you stick to the wall before painting. Then brush the liquid waterproofing over the sealing tape.
Step 2: Assemble the shower tray with the feet
To assemble the bath feet, place the shower tray on the floor with the underside facing up. The tub feet are pre-assembled on a frame that can be flexibly pulled apart and shaped. Now place this frame on the tub and adjust it so that your feet are positioned as far out as possible. The screws for mounting should be supplied with the frame. With these, you then screw the tub feet firmly to the shower tray.
Place the shower tray in its final position and adjust the height of the feet by turning. The gradient for the water is already incorporated in the tub and does not have to be taken into account. Trace the bottom edge of the tub onto the wall with a pencil. Mount the tub rim clamp brackets flush with this line. The shower basin then rests on them so as not to wobble later. You must also mark the position of the drain hole on the floor. The tub rims that are in contact with the wall are fitted with tub rim sealing tape. Glue this to the shower tray according to the instructions and fold it towards the inside of the tray. Glue soundproofing tape to the sealing tape to decouple the shower tray from the wall.
Step 3: Install drain fitting
Before the shower tray is in position, you must assemble the waste fitting or siphon according to the manufacturer’s instructions. Then place them on the marked position on the floor and connect the drain to the existing drain lines using HT pipes. When the siphon is fully connected, place the shower tray in place and onto the rim clamp supports. Depending on the mounting system, the supports are tightened with screws. Once the shower tray is fixed, connect the upper part of the siphon to the prepared drain fitting. It is important that you only tighten the screw connection hand-tight so as not to damage anything.
Now you can check whether all connections are tight. To do this, take a watering can or bucket and let about five liters run into the shower basin. Then feel with your finger at all connections of the sewage pipe whether there is moisture there. If so, you have to readjust the connections again. The prepared bathtub rim sealing tape is glued to the wall and pressed firmly. Then paint the sealing tape with the liquid waterproofing and make sure that there are no gaps at the transition to the wall.
Step 4: Underpin the shower tray
In order to create a smooth surface for the later tiles, cover the cavity between the tub and the floor with aerated concrete blocks. To do this, paint the subsurface in the area of the stones and floor tiles with a deep primer so that the adhesive adheres better. Then use a saw to cut the stones so that they are about an inch shorter than the space between the tub and the floor. Glue the aerated concrete blocks to the floor with tile adhesive. Make sure to move the stones inwards a little so that the later tile (including the adhesive) is flush with the edge of the tub. Once the glue is dry you can start and finish the tile work. Finally, a silicone joint is drawn between the tiles and the shower tray.
Installing the shower tray: step-by-step instructions with tray support
Step 1: Prepare and seal the shower area
This work step is identical for both types of installation for shower trays.
Step 2: Mount the tub support and drain fitting
Now prepare the tub support for installation. Depending on the manufacturer and system, first mount spacers on the tub support on the sides that face the wall. Then place the tub support in the desired position and place the shower tray in it. Trace the outline of the support on the floor with a pencil and mark the tub drain on the Styrofoam. In addition, you must transfer to the carrier where the existing sewage installation is located. Put the shower tray aside for the time being and assemble the drain fitting. This is also positioned on the tub support in order to mark the exact position.
You will need to cut away the Styrofoam to allow for the drain fitting and extending HT pipes to fit outside of the tub support to the plumbing. Before you connect the waste fitting to the waste water installation, check whether everything fits together with the bathtub support. If so, you can mount the siphon and remove the tub support again. Since it will be difficult to get to the pipes later, we recommend a leak test by filling a cup of water in the waste fitting and checking the transitions with your finger.
If everything is tight, you can then treat the entire floor in the area of the tub support with deep primer to bind dust and increase the adhesion of the adhesive. Then apply tile adhesive to the floor with a size 8 notched trowel and place the tub support in the mortar bed. Using a spirit level, adjust the carrier so that it sits straight. A gradient does not have to be incorporated, as the shower tray already has one integrated.
Step 3: Mount the shower tray
With the styrofoam support, the shower tray also has a tray rim seal and a sound insulation strip for decoupling. First stick the sealing tape on the shower tray and fold it away inwards. Then comes the soundproofing tape. However, both are only mounted on the sides that are in contact with a wall. Now place a thin film on the tub support so that it protrudes about ten centimeters all around. This serves as protection for the construction foam with which the shower tray is then fixed. To do this, trace the contour of the tub support with construction foam on the film – slightly inward – and press the shower tray firmly onto it. Make sure that as little foam as possible spills out and sticks to the visible area of the shower tray.
As soon as the foam has dried according to the manufacturer’s instructions, cut the foil flush with the shower tray. Then the prepared bathtub rim seal is glued firmly to the wall and completely sealed with liquid sealant. Here, too, pay attention to the transitions between the wall and the sealing tape so that there are no gaps, but a full-surface seal is provided. The shower tray is now fully assembled and you can start tiling the wall and floor. Finally, draw a silicone joint between the shower tray and the tiles. Once the work is complete, you can assemble the shower cubicle.
Advantages and disadvantages of the installation types
Tub feet
| Advantages | disadvantages |
|---|---|
| Thanks to the adjustment options, the feet can also be used on uneven ground. | The surface that can be tiled must be made with aerated concrete blocks.
This is a challenge, especially with circular showers. |
| The height of the shower tray can be adjusted.
The feet are also available in different |
The shower tray only rests on five points; likewise, the weight is only released selectively to the ground. |
Tub support
| advantages | Disadvantages |
|---|---|
| Installation is relatively easy. | The final height of the shower is fixed and cannot be adjusted. |
| The thermal insulation and sound decoupling are significantly better with the tub support. | The price of the tub support is about the same as the shower tray itself. |
| The shower tray lies on the entire surface and not just at certain points. | |
| The support can be tiled directly and the shape is optimally matched to the shower tray. |
Tips and tricks for tub installation
- Mosaic tiles can be used to set accents in the bathroom and pick them up again in the area under the shower tray. Especially with round showers, these are also sufficiently flexible to maintain the curve.
Silicone joints are maintenance joints and must be checked again and again for their condition. If they crack or peel off, you’ll need to remove the old silicone and reapply. - The waste water pipes from the drain fitting to the main line should be laid with a gradient of one percent, preferably two percent. This corresponds to a height difference of two centimeters per one meter of cable length.
- There are specially prefabricated corners made of sealing tape for inside and outside corners of showers and walls.
- Self-adhesive sealing tape is stuck to the wall and then painted over with liquid waterproofing. Sealing tape without an adhesive film, on the other hand, is pressed into a wet layer of liquid waterproofing and then painted over again.
- In order to avoid water damage, it is necessary that the liquid waterproofing and also the sealing tapes are processed very carefully. If you are unsure about the thickness of the liquid waterproofing layer, apply another layer to be on the safe side.
- Please note that the shower basin and support must be coordinated. Both parts cannot be combined indiscriminately. If there is no tub support for your desired shower tub model, the only option is to install it with feet.
- The instructions for assembling a bathtub are quite similar. However, the siphon system differs here, as the bathtub also has an overflow to prevent water damage from flooding.
- The deeper you can get into the ground with the siphon, the lower the entire shower will be in the end. With a super-flat shower tray, you only get a small step up if floor-level installation is not possible.
- An inspection opening is no longer necessary today. If you absolutely want one, we recommend installing it with tub feet instead of tub supports.
- For some shower trays there is also an apron to cover the area between the tray and the floor.
- For the installation, it makes no difference what material the shower tray is made of. Shower basins made of sanitary acrylic, steel enamel or cast mineral can be installed in both ways.